How to Troubleshoot Common Floor Scrubber Problems: A Step-by-Step Guide

Commercial floor scrubbers are the workhorses of facility maintenance, but when they break down, your cleaning operations can grind to a halt. Fortunately, many of the most common auto scrubber issues don’t require an expensive service call. Most problems stem from simple blockages, worn consumables, or minor electrical issues that you can diagnose and fix on-site.
This comprehensive floor scrubber troubleshooting guide walks you through the most common symptoms, their root causes, and step-by-step solutions to get your equipment back in action.
Floor Scrubber Troubleshooting Quick Reference
Before diving into the detailed step-by-step guides, use this quick-reference table to identify your symptom and find the immediate action step.
| Symptom | Most Likely Cause | Immediate Check / Solution |
|---|---|---|
| No water recovery / leaving pools | Clogged squeegee, full recovery tank, or vacuum motor clog | Check recovery tank level, clean squeegee hose, inspect gasket. |
| Leaving streaks on the floor | Worn or dirty squeegee blades | Wipe blades clean or flip/replace squeegee blades. |
| Brush or pad not spinning | Tripped circuit breaker or worn carbon brushes | Reset the brush motor breaker, inspect brush deck connection. |
| No water/solution dispensing | Clogged solution filter or closed valve | Clean the solution filter, verify flow valve is open. |
| Machine won’t turn on / charge | Corroded battery terminals or bad charger connection | Clean terminals, verify outlet power, test battery voltage. |
| Loud grinding or squealing noises | Debris in brush deck or failing vacuum motor bearings | Inspect brush deck for wrapped debris, check vacuum fan. |
1. Floor Scrubber Not Picking Up Water
If your auto scrubber is leaving trail marks or puddles of dirty water behind it, the vacuum recovery system is compromised. A wet floor is not only a cleaning failure but also a major slip-and-fall hazard.
- Check the Recovery Tank: Is the recovery tank full? Most modern scrubbers have an automatic float shut-off valve that stops suction when the tank is full. Drain the tank completely.
- Inspect the Vacuum Hose: Disconnect the hose from the squeegee assembly and check for clogs (such as wood chips, paper towels, or heavy sludge). Flush the hose with clean water.
- Verify the Tank Gasket: If the rubber lid gasket is cracked, worn, or misaligned, the vacuum system cannot create a tight seal, resulting in poor suction.
For a complete diagnostic breakdown of water recovery problems, read our in-depth guide on Floor Scrubber Not Picking Up Water: 7 Causes and Fixes.
2. Squeegee Leaving Streaks or Water Trails
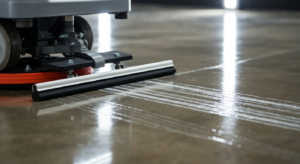
Even if the vacuum motor is working perfectly, a damaged or improperly adjusted squeegee assembly will leave unsightly streaks on your clean floors.
- Clean the Blades: Debris like hair, lint, or small pebbles often gets trapped under the squeegee blade. Wipe the rubber blades clean with a damp cloth after every use.
- Inspect for Wear: Squeegee blades have four usable edges. If the leading edge is rounded, nicked, or torn, it’s time to flip the blade to a fresh edge or replace it entirely.
- Adjust the Pitch and Angle: The squeegee should deflect evenly across its entire length. If the edges are lifting or digging in too hard, adjust the pitch wheels.
To fix squeegee-related streaking issues, see Floor Scrubber Leaving Streaks: How to Fix Squeegee Problems, or learn How to Replace Floor Scrubber Squeegee Blades (Step by Step).
3. Brush or Pad Motor Not Spinning
If your brush motor hums but doesn’t spin, or does absolutely nothing when you engage the drive bail, you cannot scrub the floor.
- Check the Circuit Breaker: Heavy friction (such as scrubbing rough concrete or using the wrong pad) can draw too much current and trip the brush motor circuit breaker. Locate the breaker button on your control panel and press to reset it.
- Check for Obstructions: Turn off the machine, remove the key, and tip the machine back (or raise the deck). Inspect the brush hub. String, plastic banding, or carpet fibers can wrap around the hub and lock the motor.
- Inspect the Carbon Brushes: In brushed DC motors, worn carbon brushes will prevent electrical contact. If the brushes are worn down to less than 1/4 inch, they must be replaced.
For a detailed walkthrough on diagnosing motor issues, check out Floor Scrubber Brush Not Spinning: Diagnosis and Repair.
4. Floor Scrubber Solution Not Dispensing
If your brushes are spinning but the floor remains dry, your scrubber is running without cleaning solution. This can damage your pads, brushes, and the flooring itself.
- Verify Solution Level and Valve: Ensure the solution tank is actually filled and that the manual flow control valve is open.
- Clean the Inline Solution Filter: Most scrubbers have a screw-on bowl filter under the frame. Over time, chemical residue or sediment from tap water can clog this mesh filter. Unscrew the bowl, rinse the mesh, and reinstall.
- Check the Solenoid Valve: If your machine has an electronic solenoid valve, listen for a “click” when you engage the solution trigger. No click indicates an electrical issue or a failed solenoid.
If your solution line is dry, follow the steps in Floor Scrubber Solution Not Dispensing: 6 Common Causes.
5. Battery Not Charging or Not Holding a Charge
Battery maintenance is the most critical (and expensive) aspect of owning a cordless floor scrubber. Lead-acid, AGM, and Lithium-ion batteries all require specific care.
- Check Terminal Connections: Loose or corroded terminals cause voltage drops that prevent charging. Clean corrosion off terminals with a wire brush and baking soda solution, then tighten the connections.
- Check Water Levels (Wet-Cell Batteries Only): If you have flooded lead-acid batteries, ensure the electrolyte levels cover the plates. Only add distilled water *after* charging, unless the plates are exposed.
- Verify Charger Output: Ensure the charger is plugged into a live wall outlet and that the charger’s profile matches your battery type (e.g., AGM vs. Wet-cell).
To troubleshoot power and charging issues, read Floor Scrubber Battery Not Charging: What to Check First.
6. Loud Grinding, Squealing, or Vibrating Noises
A floor scrubber is naturally loud, but sudden changes in pitch, heavy vibrations, or grinding sounds indicate mechanical distress.
- High-Pitched Squeal: This usually indicates a dry squeegee blade rubbing against a dry floor, or a slipping drive belt. Adjust the solution flow or inspect the belt.
- Loud Grinding or Roaring: If this noise occurs when the vacuum motor is turned on, the vacuum motor bearings are likely failing, often due to dirty foam or water bypassing the float shutoff.
- Heavy Vibrations: Check if the brush or pad driver is installed off-center, or if the pad itself is torn and bunched up under the drive block.
To decode what your machine is trying to tell you, consult Floor Scrubber Making Loud Noise: What Each Sound Means.
The Best Way to Prevent Troubleshooting: Regular Maintenance
Nearly 80% of all common floor scrubber breakdowns are completely preventable with a consistent cleaning and inspection routine. Flushing the recovery tank, cleaning the squeegee blades daily, and keeping battery terminals clean will save you thousands of dollars in repairs and downtime.
Keep your cleaning crew on track by downloading and printing our master guide: The Ultimate Floor Scrubber Maintenance Checklist: Daily, Weekly & Monthly Guide.